How to Make a Scrunchie Using Fabric Scraps in Just 10 Minutes
You've got some fabric scraps left over from making a dress or a top and you don’t want to throw them away because the fabric is way too pretty? Don't let them go to waste! Make a scrunchie! A scrunchie is a perfect, quick project that not only helps you use up those scraps but also adds a fun accessory to your collection. With just a few simple steps, you can make a beautiful scrunchie in under 10 minutes.
In a previous post I talked about how to make a twisted headband with fabric scraps as well. HOWEVER, the reality is that the strip of fabric I have let sometimes is not thick enough for a headband (usually you need 7 or 9 inches). So, when I don’t have enough for a headband I make a scrunchie. You will only need between 4 and 5 inches in width. Everyone loves scrunchies and they are great gifts or additions to bring to your pop-up markets.
I brought all these beauties to my last Christmas Market
It was hard to part with them…
Here’s how to make a scrunchie in 3 easy step in under 10 minutes.
What You’ll Need:
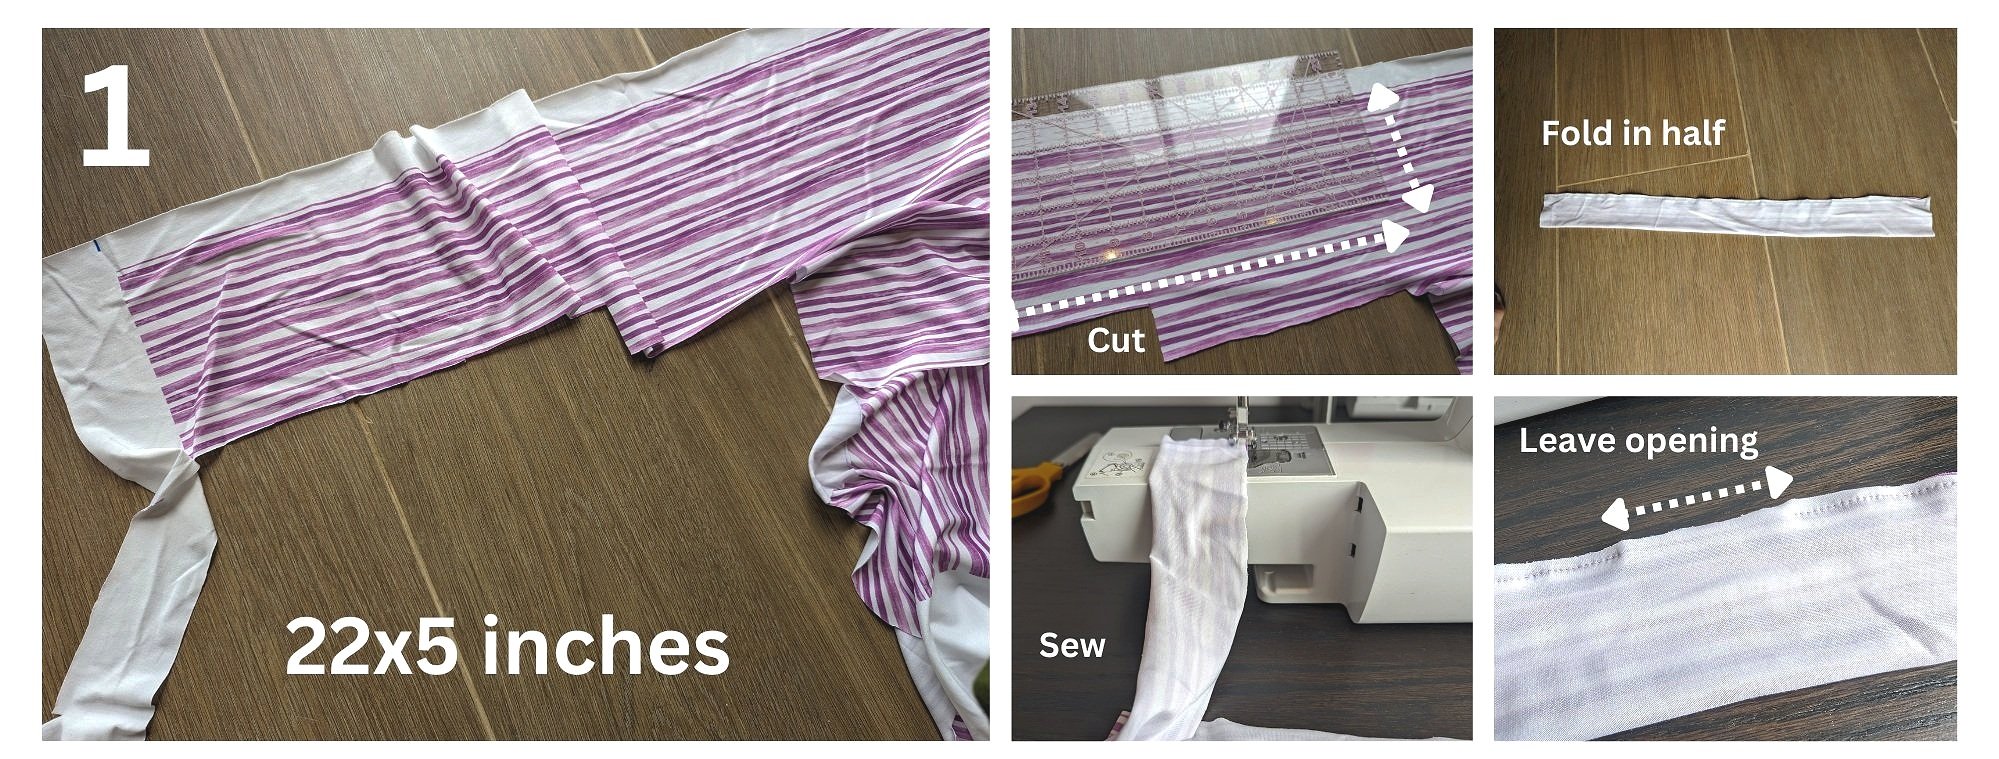
Fabric scrap measuring 22x5 inches
Elastic (6-7 inches long)
Sewing machine or needle and thread
Safety pin
Scissors
Pins
Step-by-Step Instructions:
Step 1: Prepare the Fabric and Sew Along the Edge (leaving a tiny opening)
Start by folding your fabric (22x5inches) in half lengthwise with the right sides facing each other. Pin the long edges together to secure the fabric in place.Using a sewing machine or needle and thread, sew along the pinned edge with a 1/4 inch seam allowance, leaving the short ends open and a small gap in the long to turn the fabric.
Step 2: Using a Safety Pin Flip it, Match the Ending and Sew (watch the video below)
Once sewn, use a safety pin to guide the fabric through until the pined edge meets the other edge. Then sew both sides togethere matching the seams. Watch the video for clarification of this step. Use the gap to turn the fabric inside out.
Step 3: Insert the Elastic
Attach a safety pin to one end of your elastic. Thread the elastic through the fabric tube until it comes out the other end. Make sure to hold onto the other end of the elastic so it doesn't get pulled inside the tube. Once both ends of the elastic are out, overlap them by about 1/2 inch and sew them together securely.
Final Assembly
Finish the Scrunchie: Tuck one open end of the fabric tube inside the other to create a clean edge. Sew the ends together either by hand or using a sewing machine to close the tube and finish the scrunchie.
Fluff and Adjust: Finally, adjust the fabric around the elastic to distribute the gathers evenly and fluff up your scrunchie.
And that’s it! In just 10 minutes and with three easy steps, you’ve created a stylish scrunchie from leftover fabric scraps. This quick project is not only a great way to use up fabric remnants but also makes for a cute and practical accessory.
Tips for Customization
Experiment with Sizes: Feel free to adjust the fabric dimensions for different scrunchie sizes. For a fuller scrunchie, use a wider piece of fabric.
Add Embellishments: Consider adding beads, bows, or lace to your scrunchie for a personalized touch.
Mix and Match Fabrics: Combine different fabric scraps for a unique, patchwork look.
Why Make Your Own Scrunchies?
Eco-Friendly: Making scrunchies from fabric scraps helps reduce waste and promotes sustainable crafting.
Cost-Effective: DIY scrunchies are a budget-friendly alternative to store-bought ones.
Creative Expression: Customize your scrunchies to match your outfits or reflect your personal style.
Next time you find yourself with leftover fabric, remember this quick and easy scrunchie tutorial. It's a fun way to make use of scraps and create something beautiful and functional.
Happy sewing!
Ana


